
Welcome, from sunny Australia!
My Fraser Clubman
My Fraser Clubman
I lived in Auckland,
New Zealand for all
of 1998, and just down the road from me was the Fraser Clubman factory.
It's a long story, but since I've always wanted a road-going version of
my racing car, and the best way to do that is to have a Lotus Super
Seven clone car and the Fraser looked pretty good to me. There's a
number of different types around the world, eg, Westfield, PRB, Amaroo,
Caterham, etc, but I decided to get the Fraser for a few reasons -
- Cost - With the exchange rate of the
Aussie dollar
to the NZ dollar, it works out usefully cheaper than getting an Aussie
made kit. By saving money there, I can spend more on the 'good bits' as
so end up with a pretty quick little car.
- Quality - The Fraser is equal if not
better quality in
all areas with any of the other kits. The final result does depend on
the efforts of the owner/builder though. My kit has the best interior
available from Fraser and so should be rather nicely finished when it's
done.
- Engine - The Fraser is one of only two
Seven type
cars available in Aus that can be approved to run with a two litre twin
cam engine. (The other is the Leitch) The rest of them have the Toyota
1600cc 4AGE twin cam. With the two litre Toyota 3SGE I have got for it,
it will be a mighty fast road car indeed.
- Suspension - The Fraser has better
suspension than any of
the Aussie built cars, with the inboard front rocker-arms and de Dion
rear. I do not think that an independant rear end is the way to go for these types of cars.
I originally tried to
buy Neil Fraser's
own car, but he'd already sold it to his sister and so it was no longer
for sale. The car that I'm building will be very much the same, but I
plan to have a little more power as I have a later model engine and
will
be running EFI. (Neil's car uses Webers) The kit is due for arrival in
Aus in mid-February 2003.
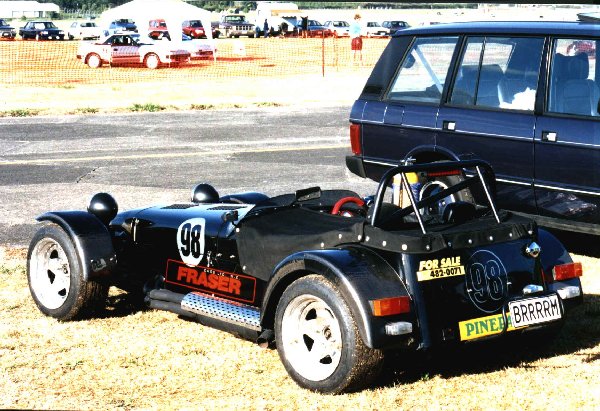
|
Here's Neil's car as it sat in 1998 at the Whenuipai race meeting in Auckland. By the time I got around to making an offer for it, it was already sold so I had to start from scratch ... |
In late June 2001 I
bought a generation
three Toyota 3SGE and a Lexus IS200 6-speed gearbox for it. There was
some work to be done to make the gearbox bell housing attach to the
back
of the 3SGE, but we did that before with the K-50 Toyota gearbox to the
back of the Suzuki racing car engine so we knew what had to be done.
Shortly after I bought the engine & gearbox though, I came
across a
generation four 3SGE & 6-speed from a
Toyota Altezza. The
Altezza is a RWD car and the front cut that I have is a very late model
one and so the engine is as well. There are two types of generation
four 3SGE's, the redtop and the blacktop, with mine being the blacktop.
The redtop is a very nice engine, with excellent ports and a very good
cylinder head.
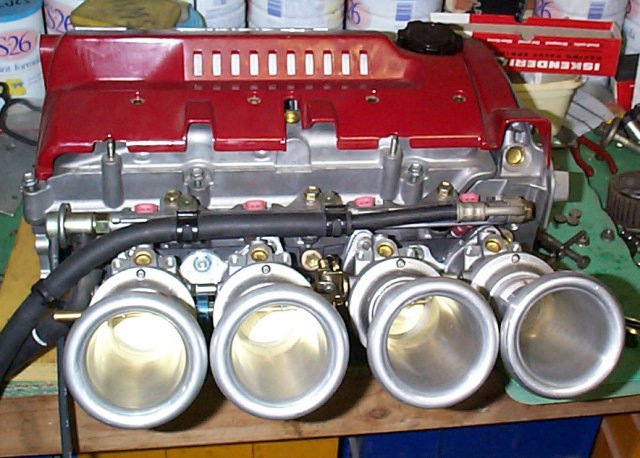
|
This a generation four redtop 3SGE head that a friend of mine owns. He's put aftermarket EFI throttle bodies on it as you can see here. |

|
The generation four 3SGE has twin VVT cam timing controllers, to improve and wider the useable torque band. The VVT pulleys are off the head here, but you can also see how relatively narrow the head is compared to the older 3SGE's. Also note the far more steeply angled inlet ports. |
 |
The generation four 3SGE's use 33mm diameter cam buckets, verses the older generation three's which all used 31mm dia buckets. The generation two 3SGTE also used 31mm dia buckets, but the naturally aspirated version and all the 1st generation 3SGE's all used 28mm dia buckets, which are the same as the 4AGE. |
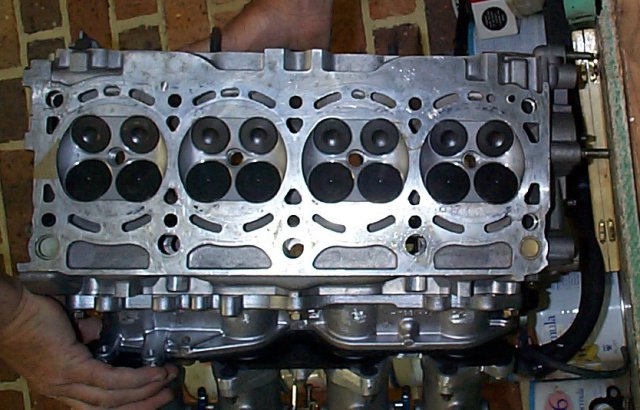 |
The latest 3SGE's all run very high compression ratio's compared to the older engines, which this redtop having a stock CR of 11.0:1 and the blacktop being 11.5:1. Also note the large size of the stock valves. |
The latest 3SGE's are a very nice engine indeed, and the blacktop version goes a little further by having titanium valves and as noted above slightly higher compression. The stock red-line is a very high 7800rpm, and the factory figures state that they make 210ps (~206hp, 154kW) and about 160ft-lbs of torque. In practice though, I'd say that they'd be more like 190hp but that's still pretty healthy indeed for a ~550kg car.
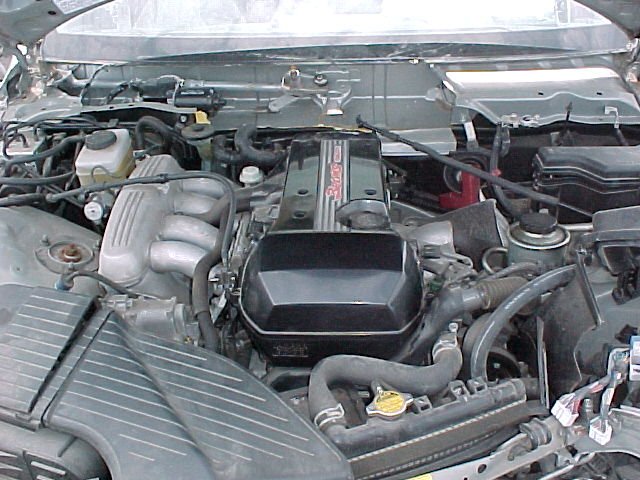
|
On the left is
the front cut that
I am getting from Japan. (I was not in Australia when it arrived, this
was taken by the importer for me in Japan). Note the large plastic
cover
over the front of the engine to protect the VVT gear. On the right is the engine and gearbox after I removed it from the front cut. |

|
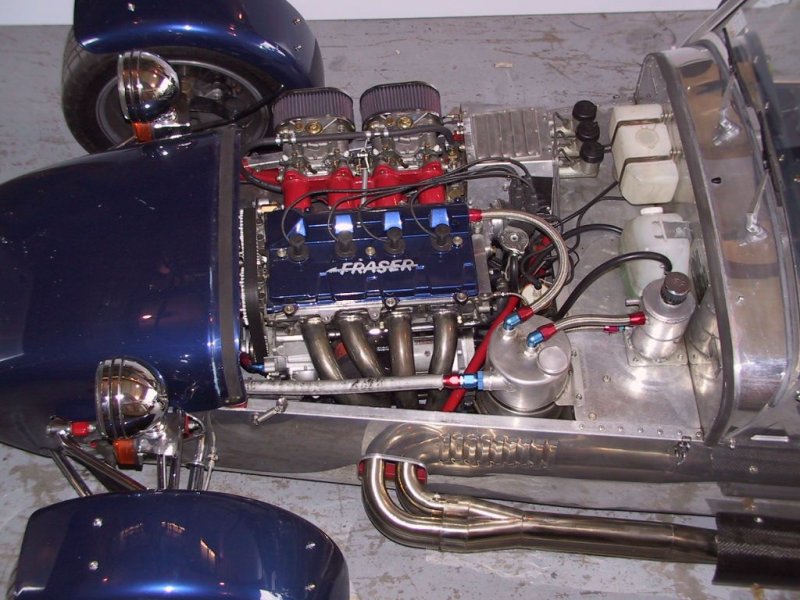
| This is not my
car, but one that I
sat in, in the Fraser factory in August 2001 to get fitted up for my
extra size. The pedal box is going to be about 5" (~13cm) further away
than the stock Fraser's are. In the picture you can see the dry-sump scavenge tank at the back of the engine bay on the left hand side. The return line from the scavenge pump runs next to the engine, just over the extractors. My car, chassis #257, will not have a windscreen and so there will be no windscreen wipers or water bottle as you see there. |
 |
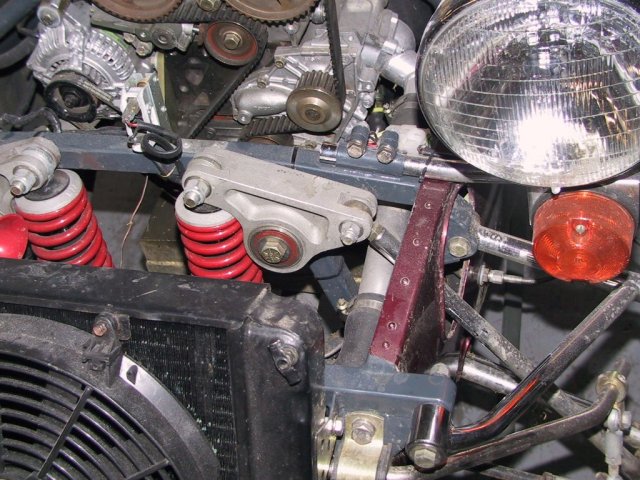
| In this picture you can see the push-rod front suspension that works the rising-rate rocker & spring/damper assembly. |
|
 |
 |
 |
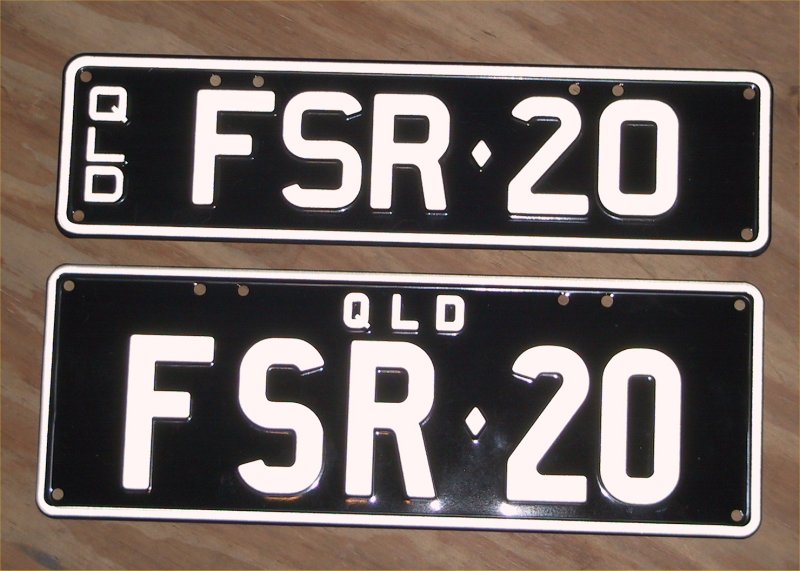 |
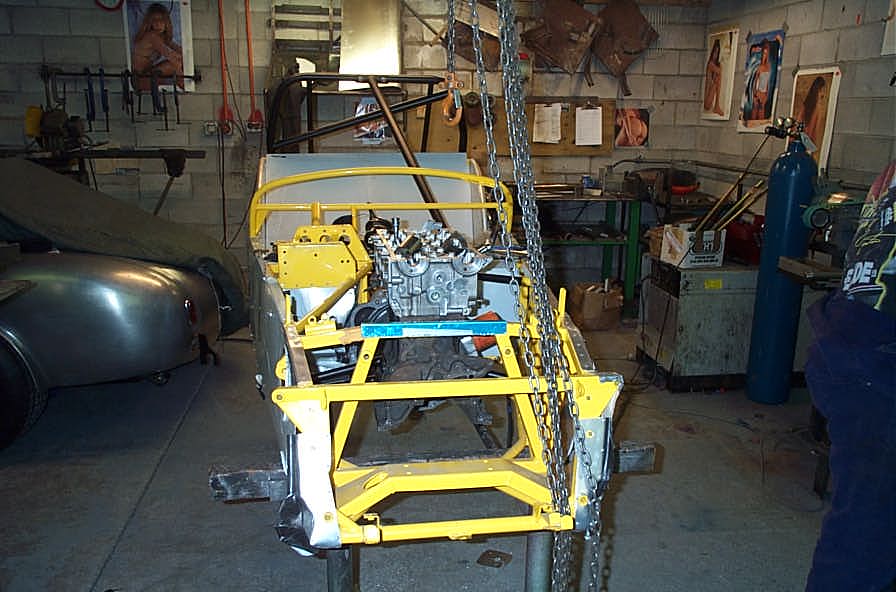
This is the car as of mid November 2002. It's not far from being shipped to Aus, but there are some delays with outside contractors providing parts. A dummy engine has been fitted to get an idea of the space available, and in the second photo you can see the exhaust pipes being test fitted. In the third photo you can see the lightweight aluminium fuel tank. In the fourth photo, you can see that I do actually have something for the car! I lashed out and bought some personalised licence plates for it - FSR-20 - which of course means that it's a two litre Fraser.
 |
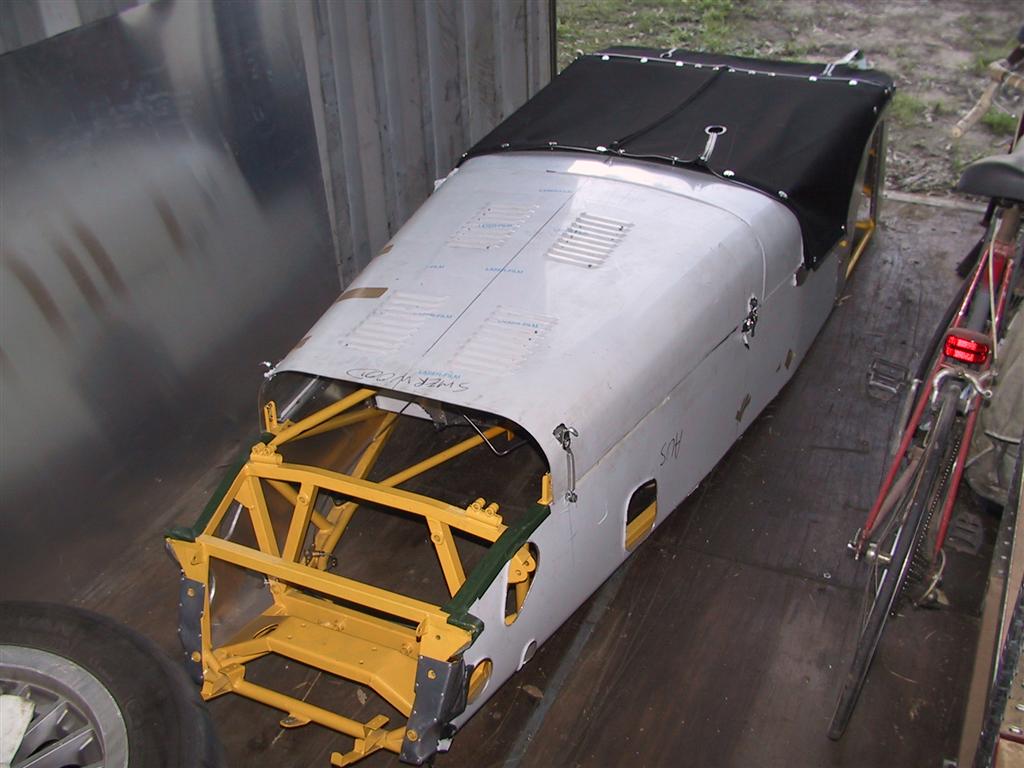
IT'S HERE AT LAST!!!!!! After a lot of mucking around from various sources, the kit finally arrived in Aus in late May 2003. It came in two boxes, one with the chassis and the other box containing just about everything else. As I type this, I'm not in the country much to do any significant work on it, but I'll be trying to as soon as I can. |
 |
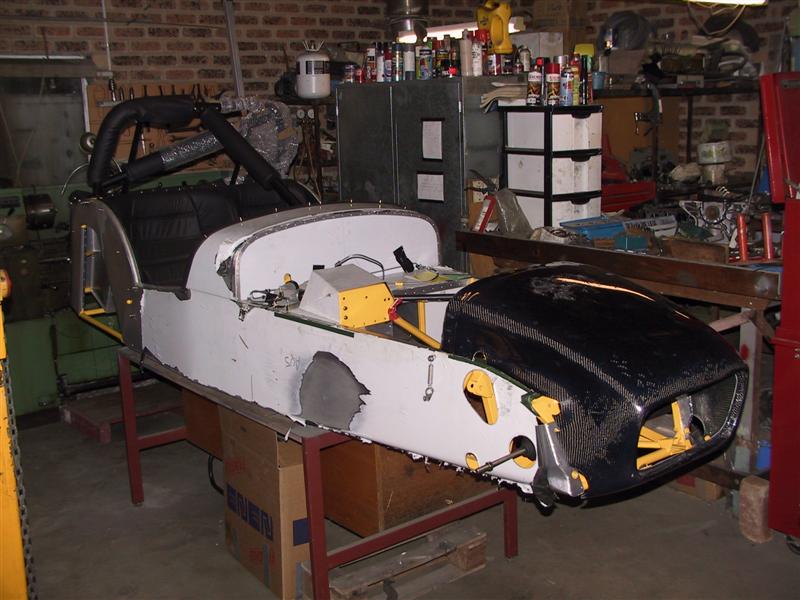 |
July 2003 The Fraser is up on the workbench and is going together at last. Most of it is fairly easy to bolt together, but there's still a lot of fiddly & very fiddly things to do to make it a complete car. The carbon nose is clear in this photo, and the guards are also carbon. |
Late
September 2003
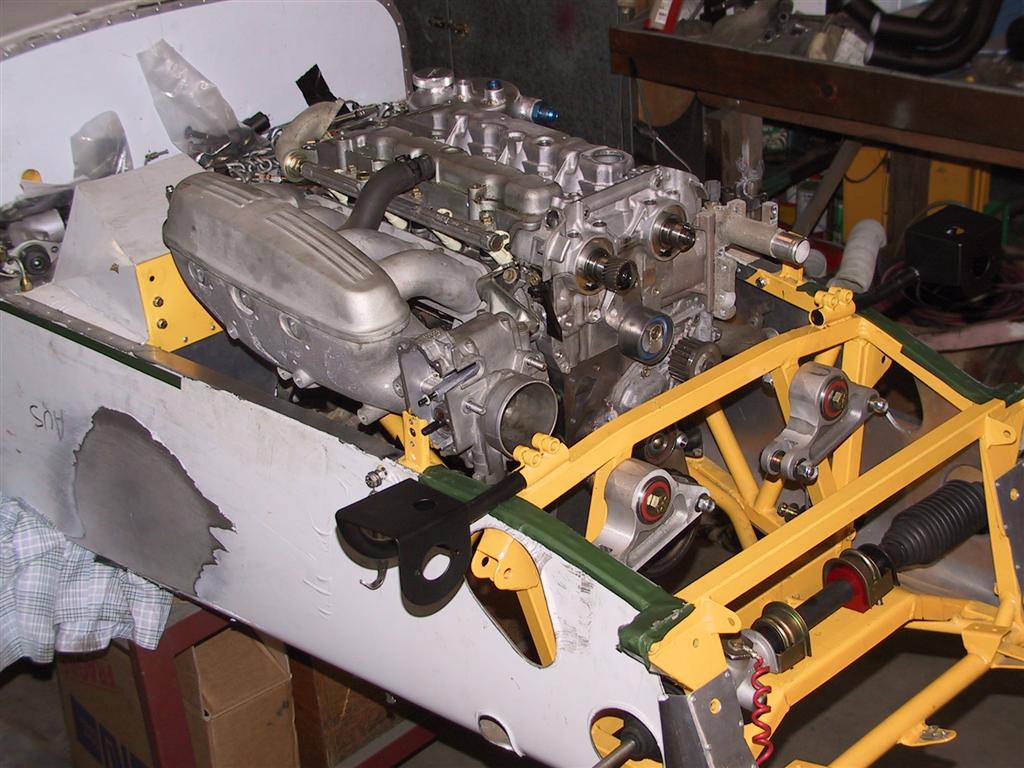 |
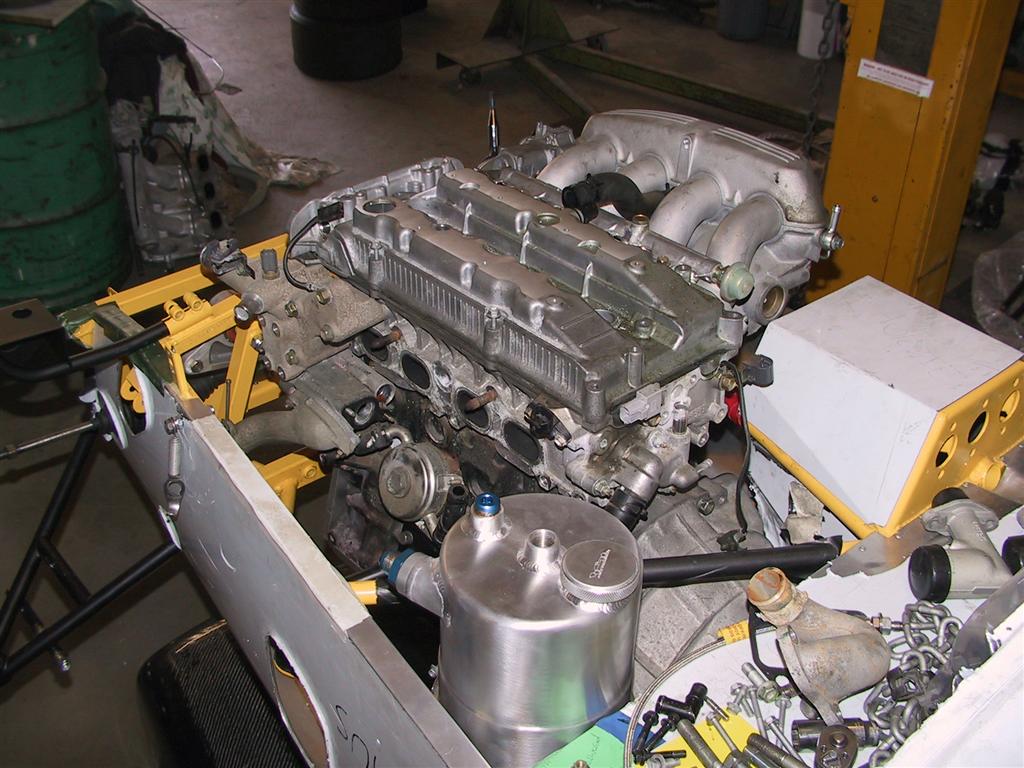
The
generation four blacktop
3SGE is finally in place, and also with the Fraser factory dry-sump
gear. It's a heck of a squeeze! Unfortunately it's so tight that we can't use the factory inlet manifold, as it has the throttle body rammed up tight against both the nose-cone catch and headlight support bracket. At the moment the solution looks like we will have to fabricate up a new inlet manifold that places the throttle body behind the head where there's a lot more room. In the picture on the left you can see the front suspension rockers, and the nearly-bare front of the engine as all the complex gear is squeezed into place. On the right you can see the dry-sump scavenge tank , and also how the cam covers have been milled so the engine cover clears them. The plastic oil filler cap that normally goes into the exhaust side of the cover will also have to go as there's no room for it, nor is it needed with a dry-sump system. |
 |
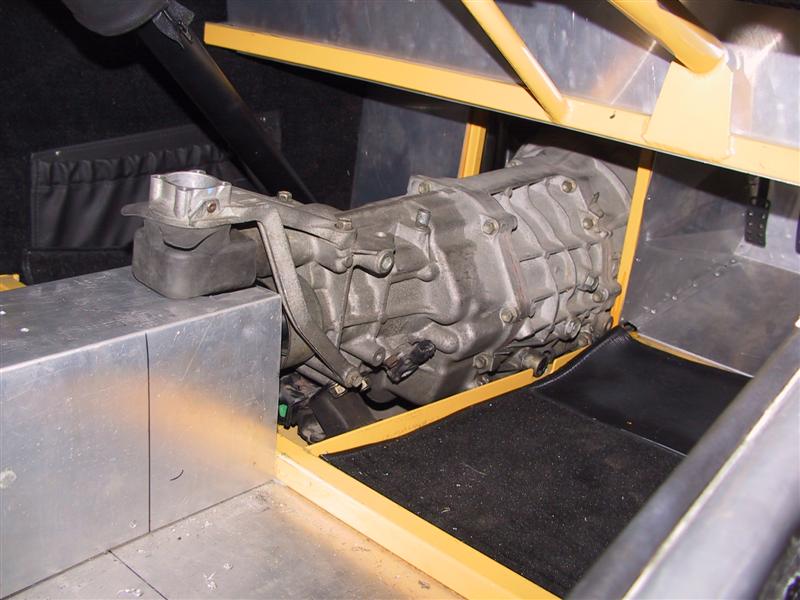 |
On the
left is a view of the
gearbox as it fits into the passenger cabin. The Aussie Clubman's
normally use a 4AGE & a much smaller T-50 gearbox, and so they
often have to have a remote linkage to connect up the gearstick to the
shift mechanism of the gearbox. The Altezza box is a lot longer and has the
gearstick way down the
back of the extension housing, so it ends up being pretty much in
exactly the right place, no mods required. A bit hard to see, but the
right side of the box as it goes past the yellow chassis tube, has been
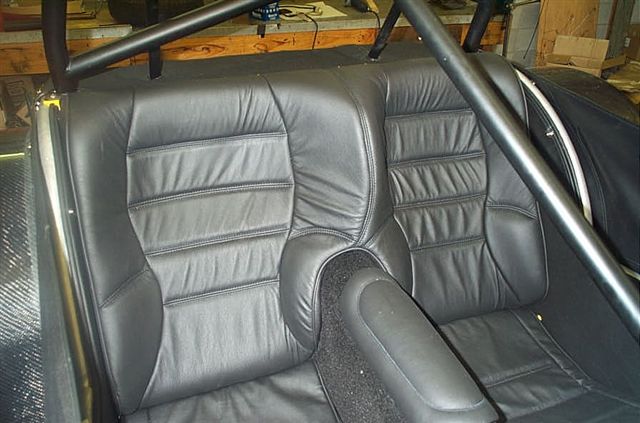
relieved to give a little more space in the gearbox tunnel. On the right is a picture of the leather seats, just before the car was diss-assembled in the Fraser factory to send it to Aus. Because I'm a bit larger than most people they had to build the seat specially for me, and you can see how the centre bolster has been moved over to the passengers side a bit to make room for my shoulders. |
 |
Late November 2003
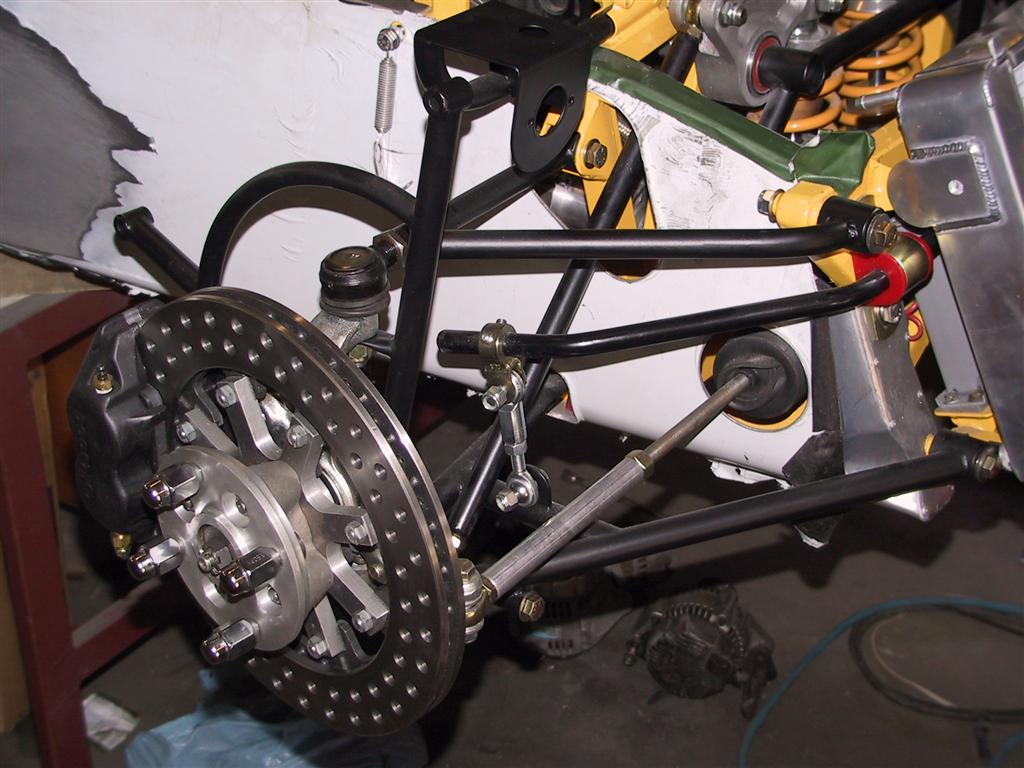 |
On the left are the huge front brakes. They require a 15" wheel to fit in as nothing smaller will fit over them. You can also see the pushrod that goes from the lower arm to the rocker, which is pictured just below. There's also the large Wilwood four-spot calipers. On the right is the rear brakes & suspension. Again it's a coil-over type, and again a large ventilated disc with Wilwood four-spot calipers. On the top of the disc sits the Wilwood handbrake caliper, cable actuated. Inside the chassis you can see the de Dion tube and half-shaft going to the Sierra diff centre. Behind the disc where it can't be seen is the large & strong alloy block that the axle hub assembly bolts to, and thin shims are used to alter the toe-in & camber to get what is needed. |
 |
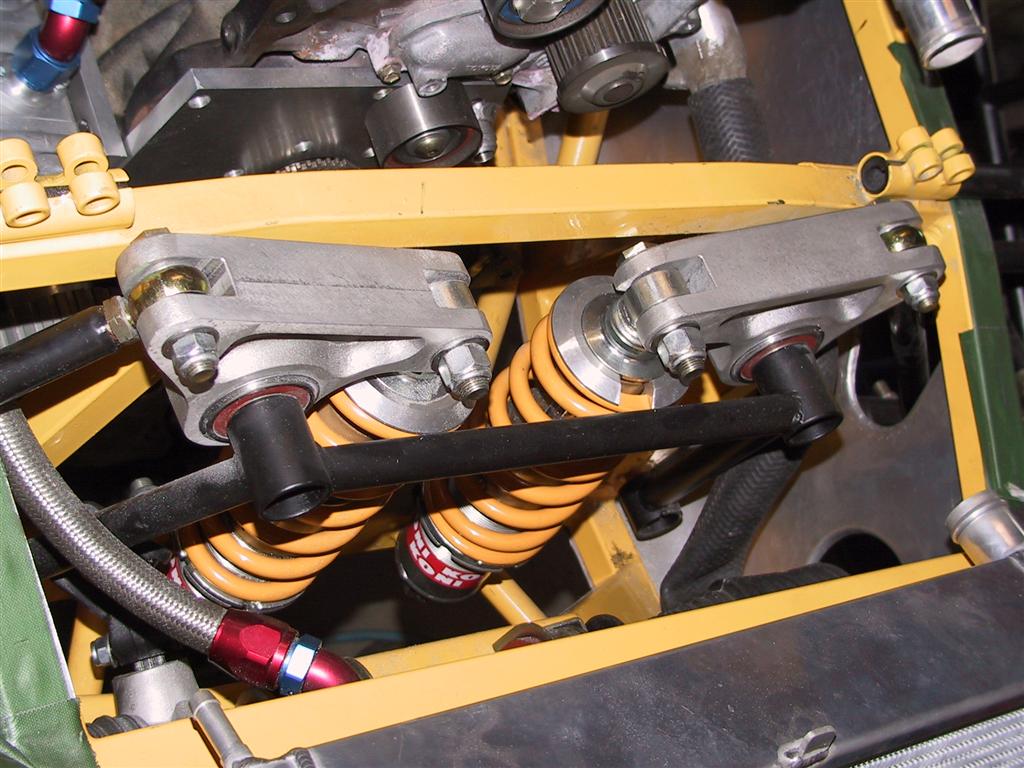 |
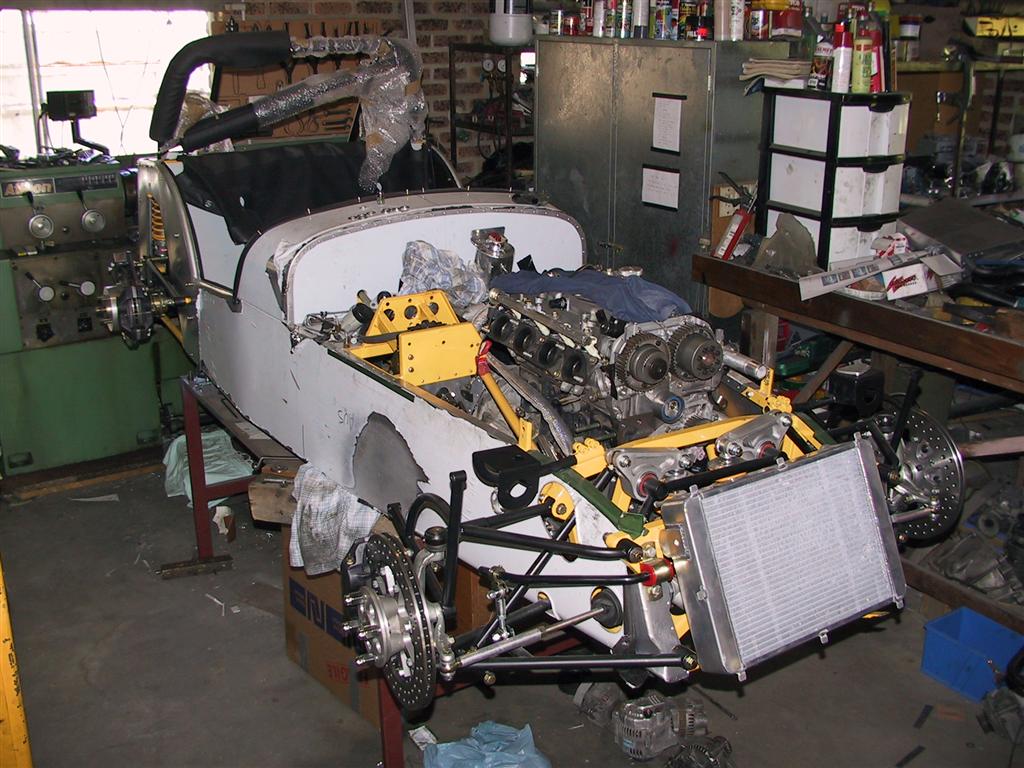
The inboard front suspension of the Fraser's are well supported with a bracing bracket on the front of the rockers. I've bought a set of double-adjustable Koni's for it so the suspension can be altered to suit any conditions. On the right is the car as of the last day of November 2003. The major components are all in place, it's mainly fiddly stuff that has to be done. The water plumbing is mostly done (See the custom alloy radiator), the electrics are the last main hurdle. Oh, and the variable cam timing pulleys are back on the front of the engine! |
 |
 |
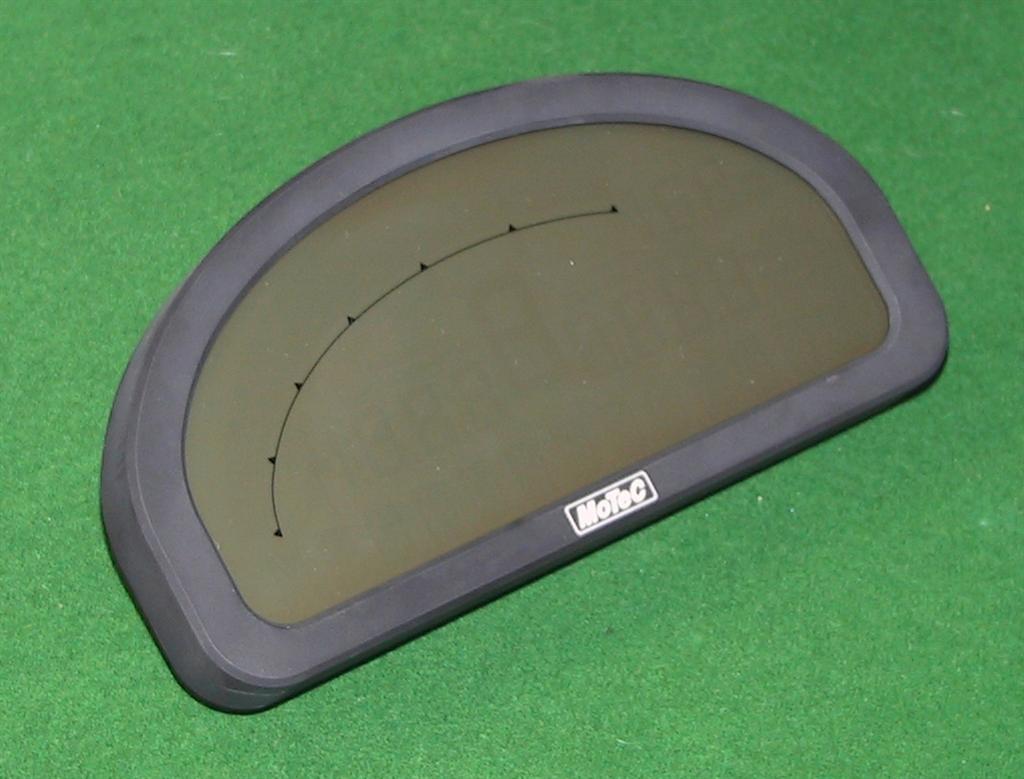
The engine is a dry-sump type, partly to reduce the overall height of the installation but also to ensure constant oil flow under heavy cornering & braking. On the left is the three-stage pump (one pressure, two scavenge) with the belt yet to be fitted. Ever since I saw the Motec ADL (Advanced Dash Logger) I wanted one, and so the Fraser is getting one. It replaces all the instruments and is also back-lit so it can be seen clearly at night. To list all the functions it can manage would take about two pages .... |
 |
Late January 2004
Things are not happening as fast as we'd like, but progress is still
being made.
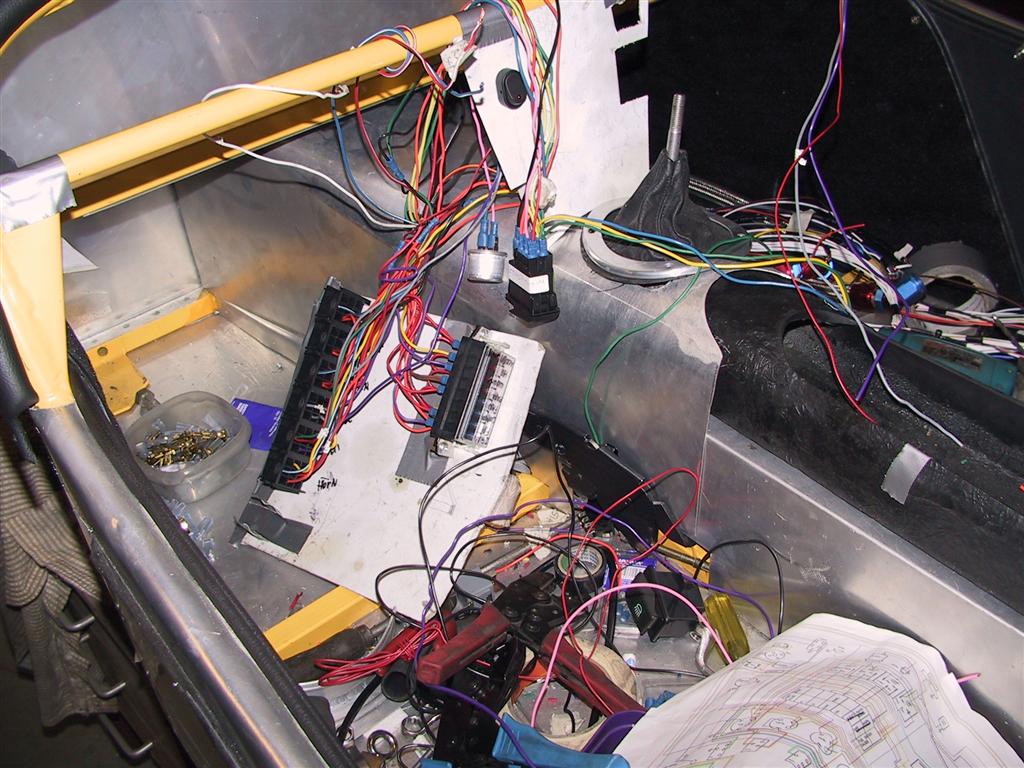 |
On the left is some of
the car's
electrics as they're being installed. That cardboard panel is one we've
taped in place to see how everything fits in place before the final
metal & plastic is cut. This panel will be hinged at the front
and
have some fastners at the rear end so it can be swung down, so the
fuses & relays can be checked very easily but still hidden when
all
buttoned up. There's also a small panel that'll go just in front of the
gearstick, and that's where all the switch gear will sit. There's not a
lot there, only the traction control, rev limit (maybe), indicators,
headlights, and emergency flasher. The car will end up with three looms
- The car's own loom, the Motec M400, and the Motec ADL. With the ADL,
we'll be sensing oil pressure & temperature, water temperature,
fuel pressure, fuel quantity, and revs. By using the interface bus from
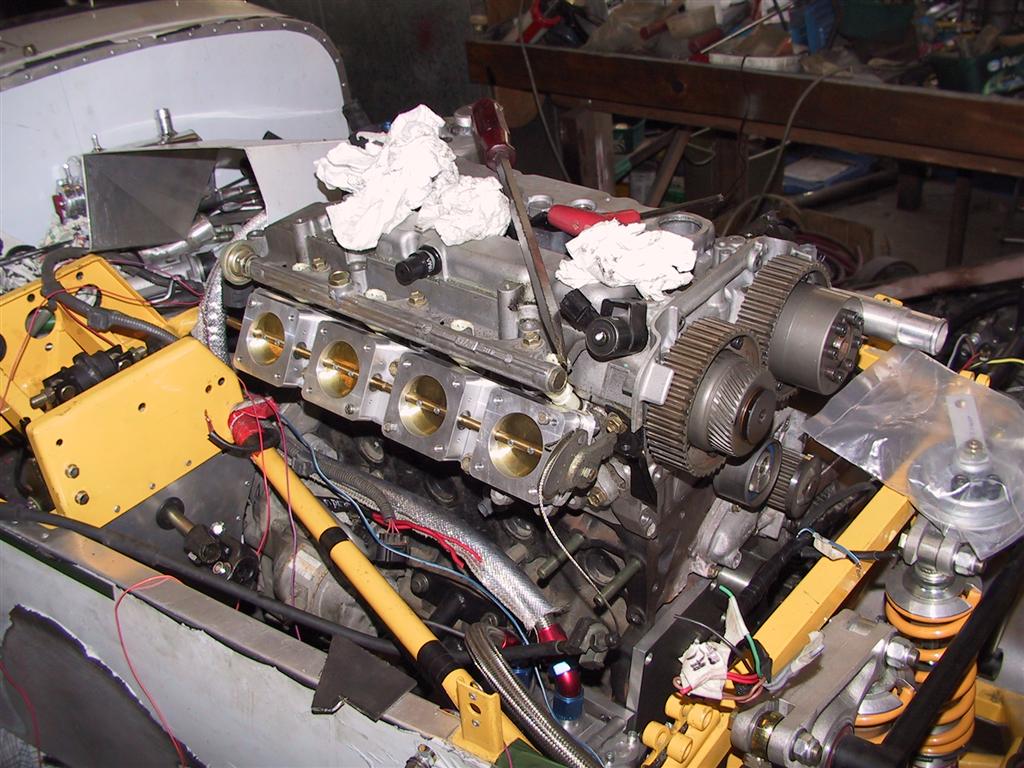
the M400, it'll know which gear the car is in as well. On the right are the quad throttle bodies that the engine will be getting. This will allow the engine some very efficient breathing. The air inlet is likely to be at the rear of the bonnet, just over the pedal box, and from there the incoming air will go forwards into the plenum chamber over the throttles. This will also allow us to fit in a reasonable-sized air filter and water seperator, for the odd drive in the rain. |
 |
Back to the Index page
Page & contents where applicable © Bill Sherwood